
STEAM Connections: Catapults
Do you know what a catapult is? You might have seen one in a battle scene in a movie or tv show.
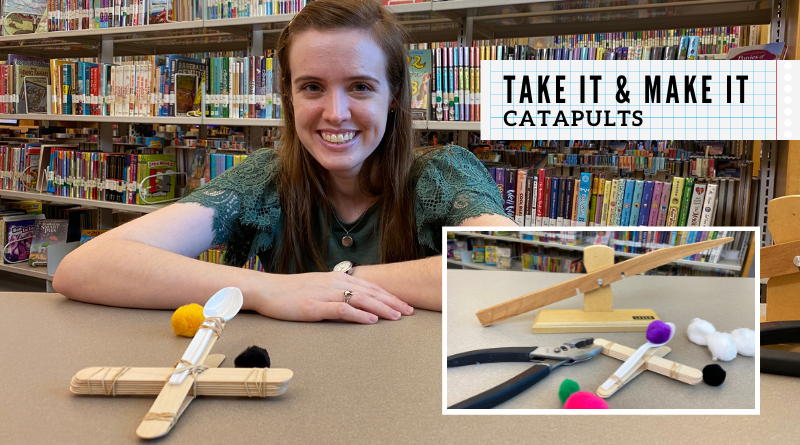
The very first catapults were made by the ancient Greeks using simple machines like levers, ramps and wheels. Simple machines are distinctive in that they have few or no moving parts, and they allow us to use less of our own energy and push, pull or lift objects. A lever is one of the six types of simple machines, and is made up of a bar or an arm resting on fulcrum, or fixed hinge. Levers are often used to help move heavy, or fixed objects. Like a crow bar, or opening a soda can. In this activity, we are going to create a small catapult using a lever made of craft sticks and rubber bands. Then we can take aim and test our launching skills.
Supplies:

- 10 craft popsicle sticks
- 5 rubber bands
- 1 cotton ball
- Masking tape – alternative to some rubber bands
- Spoon
- Scientific Observations page – print ours or draw your own
- Additional launching materials (optional): pencils top erasers, pompoms, paper clip, mini marshmallow
Instructions:
- Make your predictions – Before you get started, fill out your scientific notebook page with the materials you will be testing, and make your predictions for which object you think will propel the farthest. Why might one fly farther than another?
- Build the fulcrum – Stack 7 large craft sticks neatly and bind them together using masking tape or band together with a rubber band. You can add more craft sticks or take away some later to test different build designs.
- Build the base– Stack two crafts sticks together and tightly bind one end using a rubber band.
- Create the flinger – Wedge the fulcrum in the middle so base and flinger are spread apart. You can change the lever length of your catapult by moving your fulcrum to different positions. Test out different designs to see the effects.
- Secure in place – use two rubber bands to make an “X” around the base and fulcrum.
- Attach launcher – Use rubber bands to attach the plastic spoon onto the end.
- Launch objects – Now that you have built your catapult test out different objects to see how far they will fly.
- Measure and record – With a ruler or measuring tape, measure how far your object has gone and record your results in your notebook.
- Redesign and test:
- What do you think would happen if you made the spoon arm longer?
- Would a heavier object, like an eraser topper be launched further than or not as far as a light object, like a cotton ball?
- How can you improve the design to make objects fly farther or more precise?
Review:
Take a look at your catapult. What do you think would happen if you made the spoon arm longer? What if you launched a heavier object (such as an eraser topper) instead of a cotton ball? Do you think the object would go further?
Set up a target and try to hit a bullseye with your catapult. How could you improve the design of your catapult to make objects fly farther or be more precise? Does the amount of force you use to launch your catapult affect the distance your object will go?
Books to Explore:
Use our catalog to search for books and other items in the library collection to learn about catapults, machines and physics.
- Simple Machines STEAM Kit
- Preschool Science Motion and Simple Machines kit
- The Art of the Catapult by William Gurstelle
- The Kid’s Book of Simple Machines: Cool Projects & Activities That Make Science Fun by Kelly Doudna
- You Wouldn’t Want to Live Without Simple Machines! by Anne Rooney

Related Posts

Learn About and Celebrate Earth Day

Solar Eclipse: Sunsketcher
